The Ultimate Guide to Choosing the Perfect Pergola
Choosing the right pergola for your outdoor space can be a delightful yet daunting task. With various styles, materials, and features available, it’s essential to consider several factors to ensure you select the perfect structure that complements your home and meets your needs. Here’s a comprehensive guide to help you navigate the process of choosing a pergola.
1. Understand Your Purpose
Before diving into styles and materials, clarify why you want a pergola. Is it for shade, aesthetics, or to support climbing plants? Knowing your primary purpose will guide your decisions.
2. Consider the Location
Evaluate where you want to place your pergola. Factors like sunlight exposure, wind direction, and proximity to your home can influence your choice. A location that receives ample sunlight may benefit from a solid roof, while a shaded area could be perfect for a more open design.
3. Choose the Right Material
Pergolas come in various materials, each with its pros and cons:
- Wood: Offers a classic look but requires regular maintenance to prevent rot and weather damage.
- Vinyl: Low maintenance and durable, but may lack the natural aesthetic of wood.
- Aluminum: Lightweight and resistant to rust, making it ideal for various climates.
4. Explore Different Styles
Pergolas come in numerous styles, from traditional to modern. Consider the architectural style of your home when selecting a design. A modern home may look best with a sleek aluminum pergola, while a rustic home could benefit from a wooden structure.
5. Think About Size
The size of your pergola should be proportional to your outdoor space. A large pergola can overwhelm a small yard, while a tiny one may look lost in a vast garden. Measure your space and visualize how the pergola will fit into your landscape.
6. Add Features
Consider additional features that can enhance your pergola:
- Lighting: String lights or built-in fixtures can create a cozy ambiance.
- Screens: Adding screens can provide privacy and protection from insects.
- Heating: If you plan to use your pergola year-round, consider incorporating heating elements.
7. Budget Wisely
Set a budget before you start shopping. Pergolas can range from a few hundred to several thousand dollars, depending on size, material, and features. Remember to factor in installation costs if you’re not planning to do it yourself.
8. Check Local Regulations
Before finalizing your pergola, check with your local authorities about any permits or regulations regarding outdoor structures. This step can save you from potential headaches down the line.
9. Seek Professional Help
If you’re unsure about the design or installation, consider consulting with a professional. They can provide valuable insights and help you create a pergola that meets your needs and adheres to local codes.
Conclusion
Selecting the right pergola involves careful consideration of your needs, space, and style preferences. By following these guidelines, you can create an inviting outdoor area that enhances your home’s beauty and functionality. Happy pergola shopping!
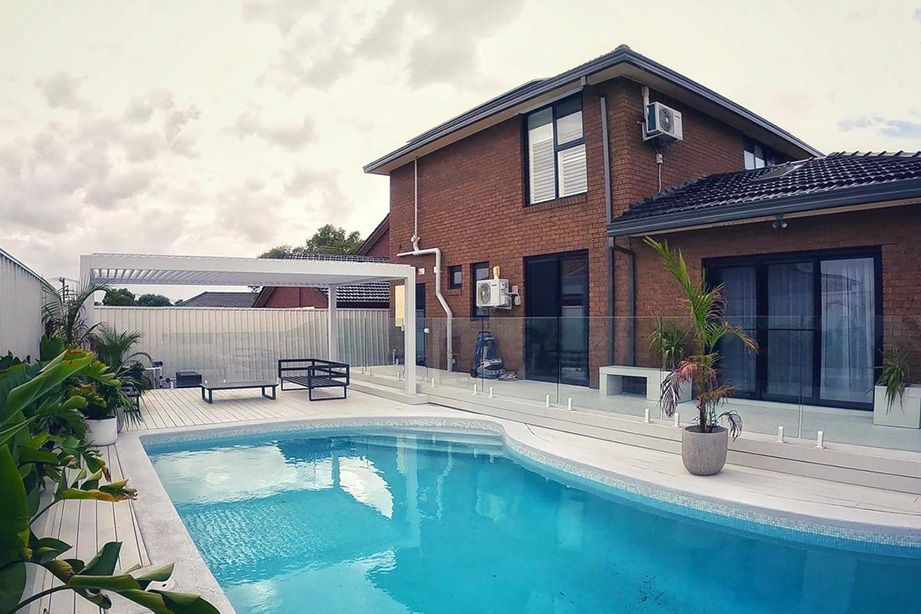
The Reality of Pool Ownership: Why You Need Proper Shade
You spent months watching the diggers tear up your lawn. You picked out the tile, filled the water, and finally hosted that first big summer swim. The kids are having the time of their lives.
But then, the reality of pool ownership hits you.
While the kids are splashing around keeping cool, you’re sitting in a plastic lounge chair, baking in 95-degree heat. You spend the whole afternoon awkwardly shifting a flimsy patio umbrella every twenty minutes just to keep the sun out of your eyes.
If you’ve invested thousands into a backyard pool, you’ve really only built half the dream. The other half is where you actually sit, dry off, and relax. If you’re searching for poolside pergola ideas to fix this, here is why upgrading to a modern cabana is the best money you’ll spend this summer.
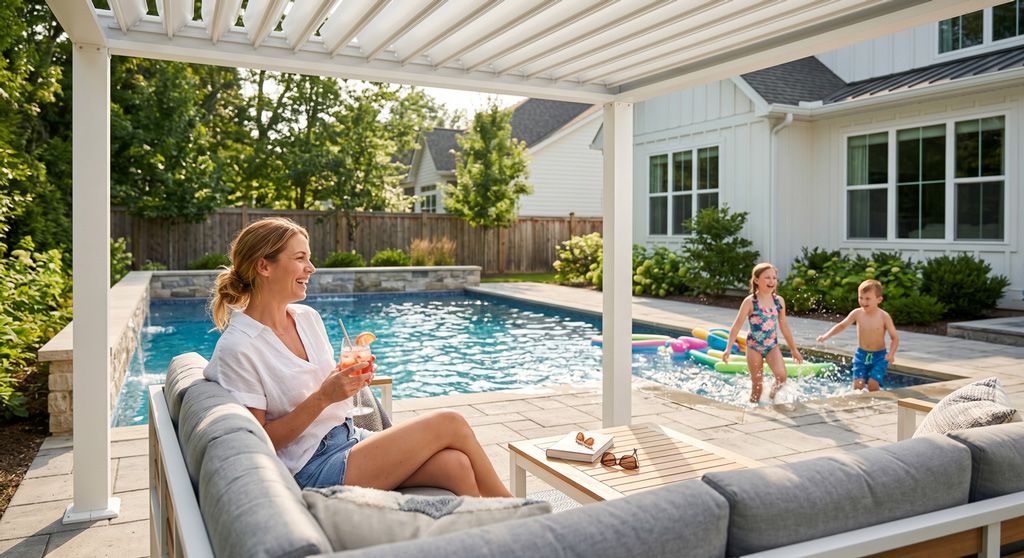
The "Mom Zone" (Because Supervising is a Full-Time Job)
Let’s be real: when you’re the parent on pool duty, you can’t exactly check out. You need eyes on the water at all times. But doing that in direct sunlight feels like a punishment.
You need a proper basecamp. A shaded spot where you can comfortably read, keep the snacks out of the sun, and actually enjoy being outside while the kids swim.
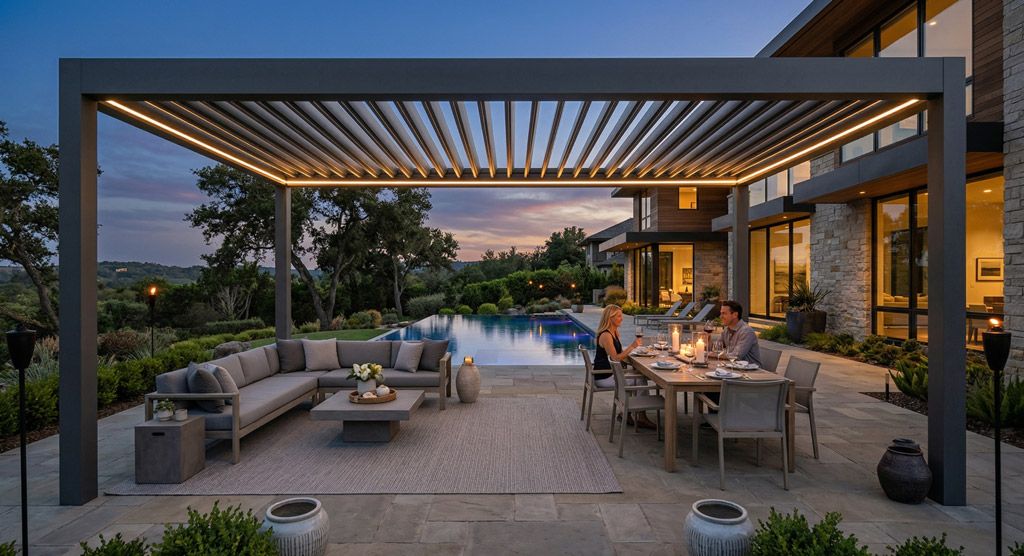
This is where a modern aluminum pergola changes everything. With a motorized louvered roof, you aren't stuck with just "open" or "closed." You can tilt the roof with a remote to block the harsh afternoon glare while still letting a cool breeze flow through. It’s instant UV protection for the kids when they get out to eat, and a much-needed retreat for you.
Handling Real-World Weather (Texas, Florida, and Beyond)
If you live in a Sunbelt state, a poolside pergola isn't just a nice aesthetic; it’s survival.
- The Texas Heat: If you’re in Dallas or Houston, you know the pool deck gets hot enough to burn bare feet by 2 PM. A louvered roof physically blocks that thermal heat, dropping the temperature underneath by up to 15 degrees.
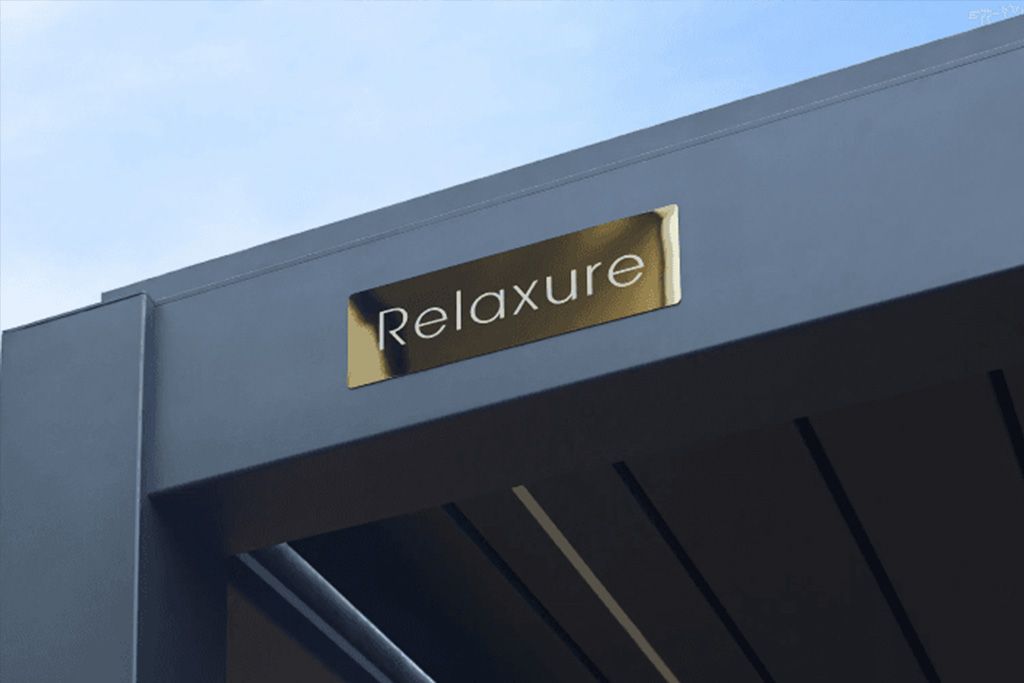
- The Florida Rain: Florida families know the drill—the inevitable 3 PM summer downpour. Instead of sprinting to grab the towels and cushions, Relaxure’s integrated rain sensors automatically close the roof watertight at the first drop of rain. You don't even have to get out of your seat.
- The California Look: In SoCal, it's all about that seamless indoor-outdoor flow. A custom aluminum cabana makes your yard look like an upscale resort, rather than just a yard with a pool in the middle of it.
See how our motorized louvers give you total weather control.
The Splash Zone: Why Wood is a Bad Idea Next to Water
We all love the look of those wooden cabanas on Pinterest. But in reality? Next to a pool, wood acts like a sponge.
Between the splashing kids, the high humidity, and wet swimsuits, wood will eventually rot, warp, or attract bugs. You’ll spend your spring weekends sanding and re-staining it. And steel kits? One splash of chlorinated or saltwater, and you’ll have rust stains dripping onto your expensive new pavers.
This is exactly why we use 6063-T6 Aviation-Grade Aluminum. It literally requires zero maintenance. It’s 100% rust-proof and pool-safe. If it gets dusty, you just hose it off. Your kids can splash it all day long, and it will look exactly the same ten years from now.
Read more about why our aluminum is completely rust-proof.
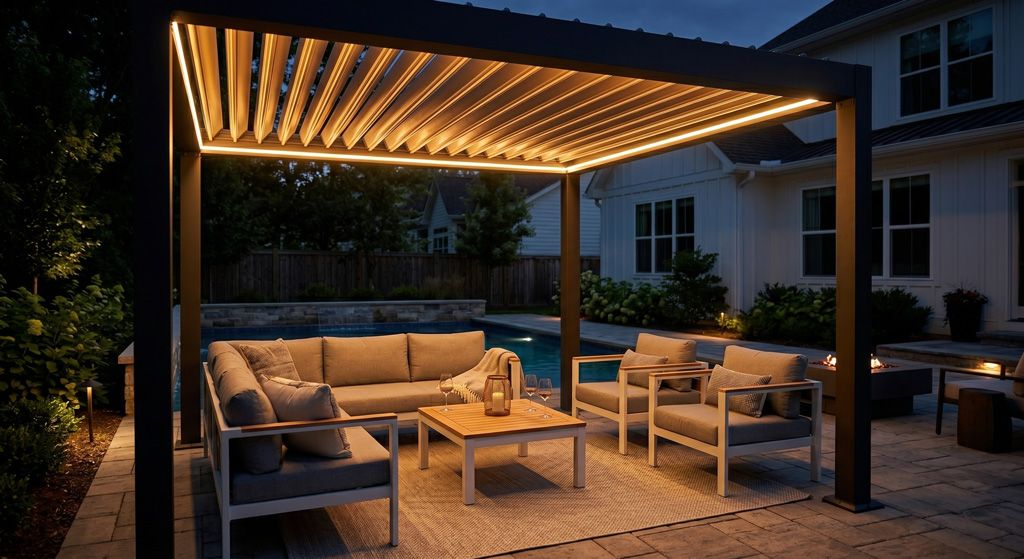
Taking Back the Night
Pool days inevitably turn into pool nights. Instead of stringing up cheap lights that break in the first windstorm, a high-end pergola comes with integrated LED lighting built right into the frame.
When the sun goes down, you just hit a button. It instantly transforms the space from a chaotic kid-zone during the day to a quiet, softly lit spot for a glass of wine with your spouse at night.
Reclaim Your Backyard
This Summer Don't spend another season hiding indoors while the kids have all the fun outside. With a modular setup, you can have a custom-fit poolside oasis delivered and installed way faster than hiring a contractor to build from scratch.
Stop baking in the sun. Build your perfect poolside retreat today.
Explore and Design your Backyard Retreat
Why "Good Enough" Isn't Good Enough: The Value of Precision Customization
Walk into a big-box store, and you’ll find pergolas in two sizes: 10x10 and 12x12. But look at your patio. Is it exactly 10 feet wide? Probably not. It might be 11 feet 4 inches. Buying a "cookie-cutter" structure forces you to compromise—either blocking a window with a post or leaving an awkward gap. At Relaxure, we believe the pergola should fit the house, not the other way around.
The "Standard Size" Trap
Buying a standard kit often leads to hidden headaches:
- The "Window Block": A standard 12-foot post spacing might land right in the middle of your living room view.
- The "Awkward Gap": If your patio is 14 feet wide and you buy a 12-foot pergola, you’re left with 2 feet of unusable "dead space" that collects dirt.
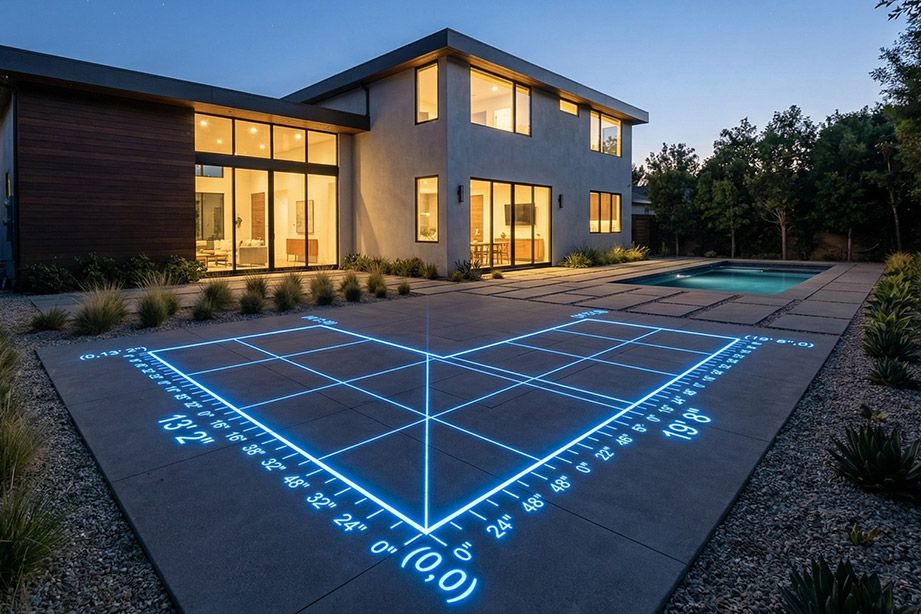
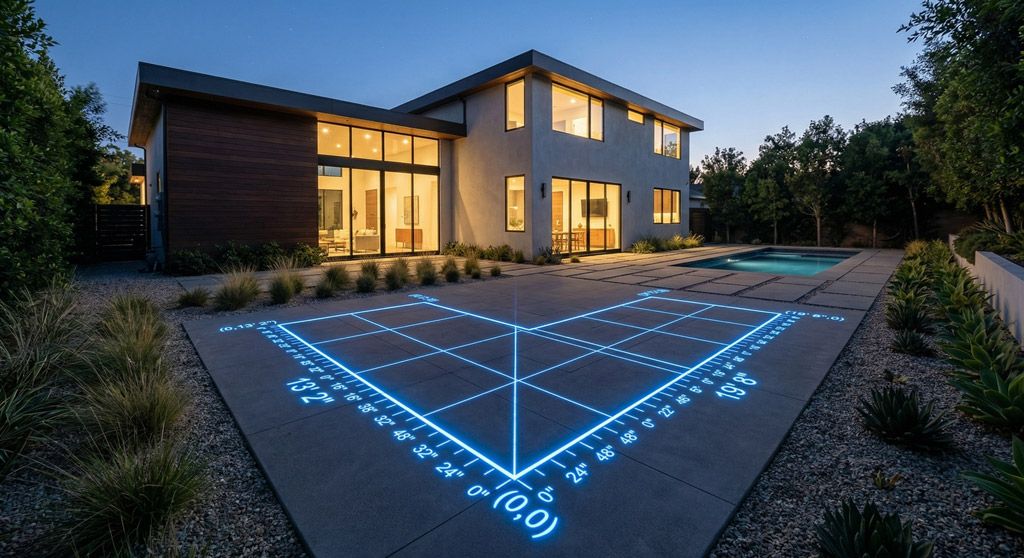
The Relaxure Solution: Millimeter Precision We offer true custom size aluminum pergolas.
- Length & Width: We customize down to the inch. If you need 13' 2" x 19' 8", we manufacture exactly that.
- Height: Adjust leg heights to accommodate sloped patios (crucial for water drainage).
Does Custom Cost More?
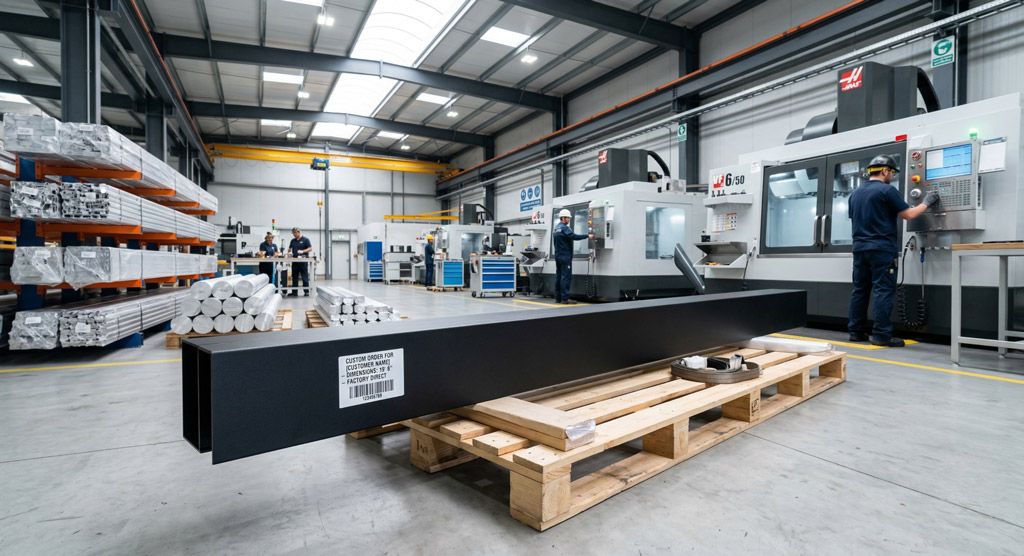
Traditionally, yes—about 300% more. But Relaxure’s "Direct-to-Consumer" model changes the math.
- The Old Way: Custom Steel Welder = $20,000+
- The Relaxure Way: Factory Direct Custom = Starting at ~$5,000 We bring the price of mass production to the world of custom design.
Start building your custom dimensions now.
A Flawless Finish
A custom fit looks expensive. It looks like it was designed by an architect specifically for your home. It adds resale value in a way that a generic kit never will.
Don't compromise on your vision. Request a Custom Quote.
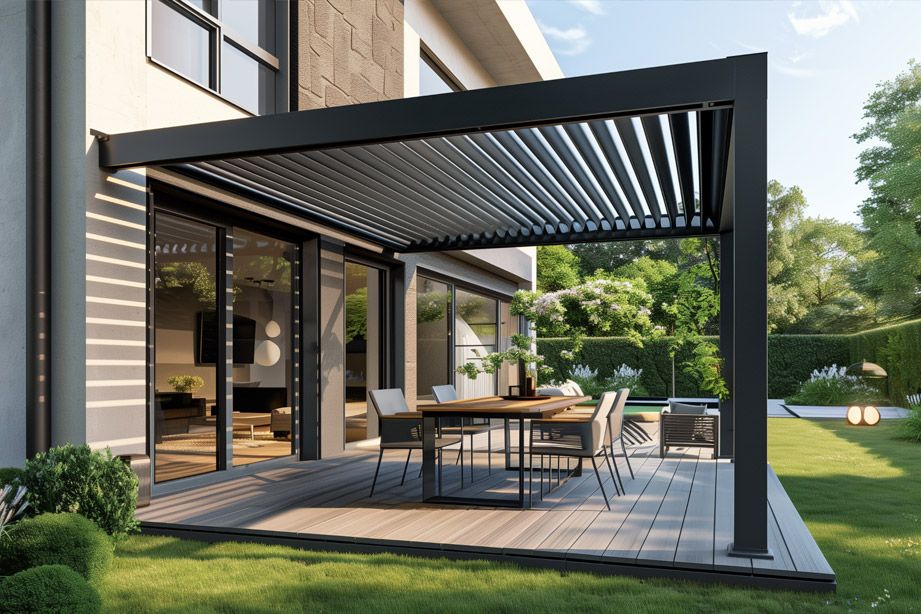
Wall-mountd vs. Freestanding Pergola: Which is Right for Your Home?
One of the first questions our design team asks is: "Do you want to walk out of your back door directly under shade, or do you want a destination in your garden?" The choice between an wall-mounted pergola and a freestanding pergola fundamentally changes how you use your outdoor space.
The Case for the wall-mounted Pergola
A wall-mounted pergola creates a seamless flow from indoors to outdoors. It essentially adds a new room to your home without the cost of a full addition.
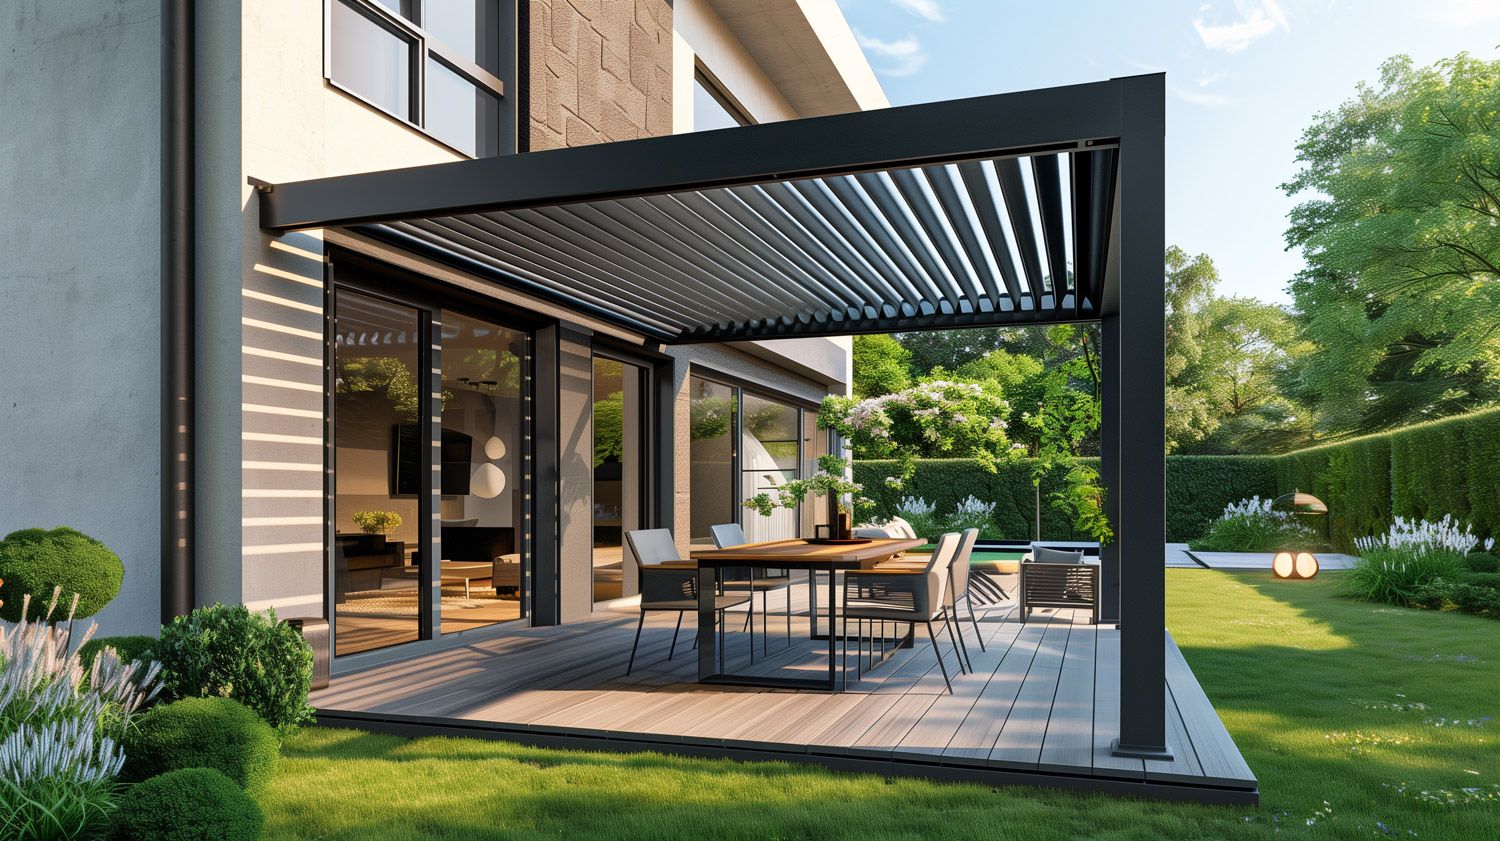
- Pros:
- Weather Protection: You can step out in the rain without getting wet. Ideal for covering sliding glass doors.
- Structural Strength: By anchoring to your home's ledger board, you gain incredible stability (often using fewer posts, creating a cleaner look).
- Energy Efficiency: It shades your windows, reducing indoor cooling costs in summer.
- Cons: Requires a solid wall structure for mounting.
Explore our Wall-Mounted Series specs
The Case for the Freestanding Pergola
A freestanding pergola is a destination. It can be placed anywhere: by the pool, over a hot tub, or in the middle of a garden.
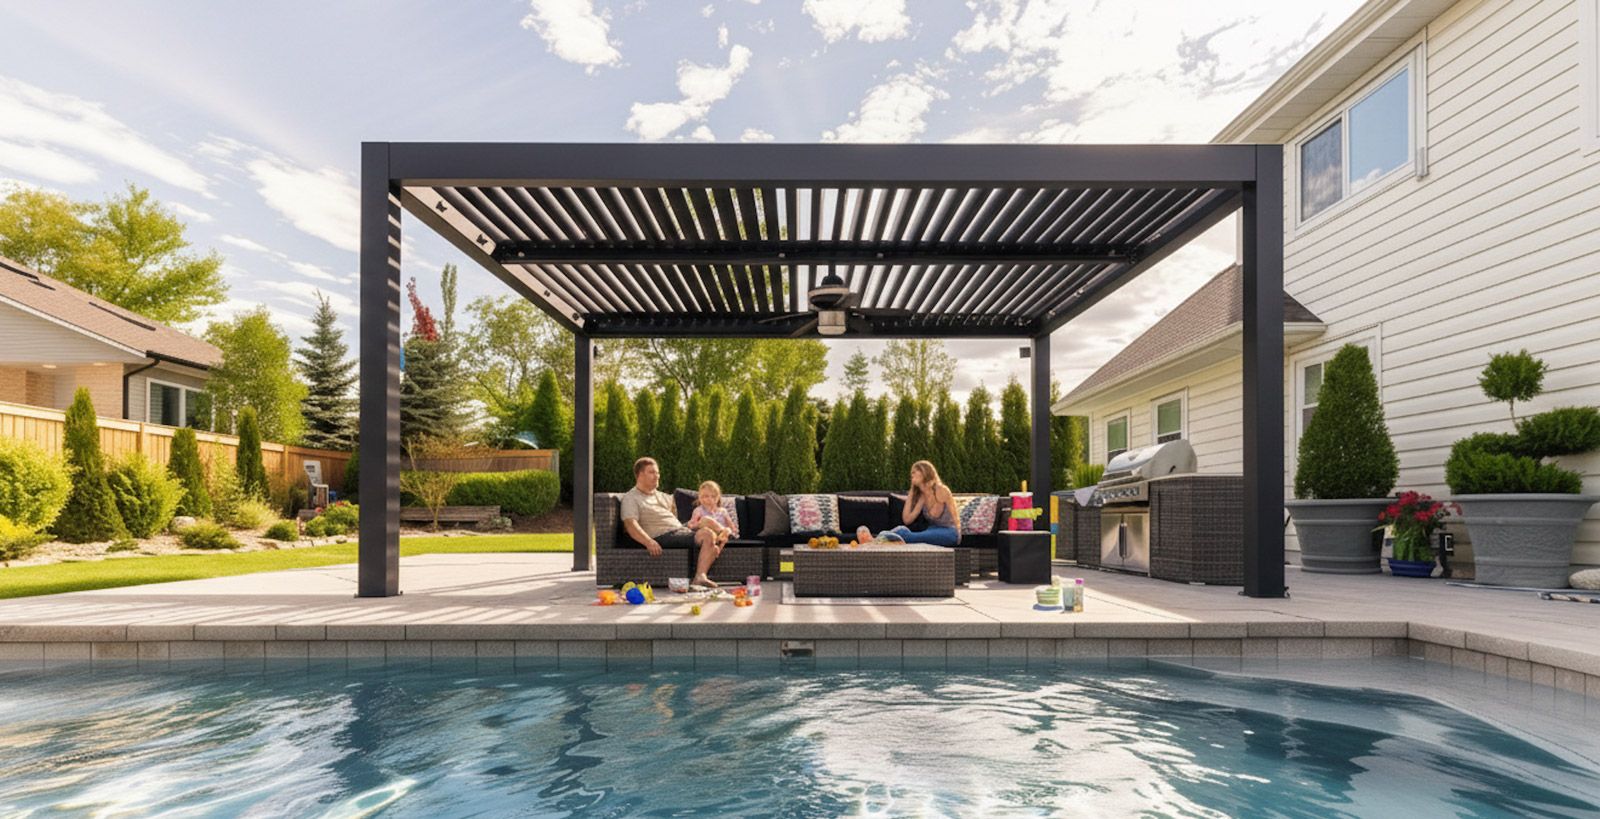
- Pros:
- Flexibility: No need to worry about your house's siding, rooflines, or gutters. You have total creative freedom.
- The "Zone" Effect: It creates a distinct "zone" for entertainment, separate from the house.
- Cons: Requires 4 posts (or more), which can slightly obstruct views compared to a 2-post wall-mounted system.
Installation Considerations
- For wall-mounted: You need to locate your wall studs or header. Relaxure provides specialized wall brackets engineered for high load-bearing capacity.
- For Freestanding: You simply need a solid footing (concrete slab or deck footings).
Which One Wins?
If you want an "outdoor living room" that feels like part of the house, go Attached. If you want a "poolside resort" vibe, go Freestanding.
Still not sure? Let our designers look at your patio.
Get a Free Design Consultation
Got something specific in mind, send us a message
If you fill out the contact form below, one of our representatives will reach back out to you in a timely manner.